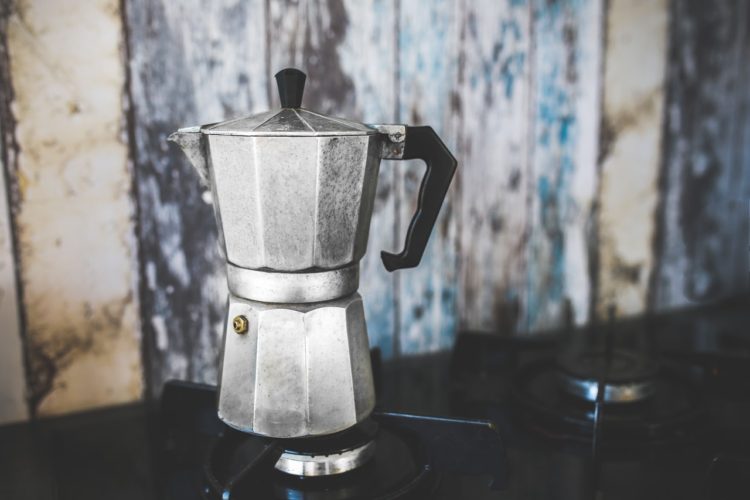
While many people choose coffee machines to make their morning cup of coffee, coffee percolation has been a method for ages. Some people prefer this old-school style of brewing up coffee while others, who surely appreciate the way it tastes when made for them, don’t realize it isn’t as complex as it seems.
If you only knew how great coffee could taste if you percolated it, perhaps you’d do it too! It doesn’t take as much time as you think and gives you the perfect cup of coffee to start your day.
Still, if you know nothing about percolating coffee, it might feel intimidating to attempt, especially at the crack of dawn. There’s a lot to think about with the proper water, the technique, and of course, the coffee beans you use. All it takes though is finding the perfect time for percolation to get it right.
It’s no big mystery, though perhaps you’d like to make your first percolated coffee one day when you have time to experiment. From there, you’ll soon see that percolating it yourself is quicker and easier than you ever imagined.
Wondering how long you should percolate your coffee? Keep reading and by the end of this article, you’ll be a percolating pro!
How Long Should You Percolate Your Coffee?
The time you should allow your coffee to percolate depends on the strength you like to take your coffee at. Generally, anything longer than 10 minutes will result in a burnt and bitter taste. For most people, 6 to 8 minutes is ideal, but it can vary depending on how you choose to percolate your coffee. Time isn’t as important as the process you engage in though.
Yes, percolating your own coffee is a very hands-on way of making your coffee. This is why for your first attempt, you should try it fully-awake when you have some time to make sure you’re doing it right. You’ll have to watch your percolator carefully to observe for steam. When the water is boiling, your coffee grounds are oversaturating. It takes raising the temperature at a slow pace and reducing the heat before it can boil.
Wait! Don’t give up! It does sound complicated, we admit, but it’s so simple that once you run through it yourself, you’ll wonder why you ever made it any other way. You can get that amazing percolated coffee in less than 10 minutes. Keep reading and you’ll know everything you need to know to make that happen!
What is a Coffee Percolator?
Since most people have a coffee maker of some kind that they just poke and jab at in the morning to make coffee or even use the kind with the pods, it’s not as common to see a coffee percolator. You may have seen one at your grandparents’ home once but not realized what it was.
Basically, it’s a pot that has a chamber at the bottom. From this chamber, there’s a tube that comes straight up. Below the top end of the tube is a perforated chamber. You put the grounds in the top chamber and the water in the bottom. When that water boils, it goes up the tube and over the grounds which cools the water and then heads back down to the bottom chamber to repeat the cycle.
You might think this rustic method is a terrible way to make coffee, but that’s where you’re wrong. Coffee purists know that when you get that technique right, this is one of the best ways to enjoy coffee in its most spectacular form. A coffee percolator is a wonderful tool for those that enjoy camping or to use when you only have a stove or hot plate handy. On the campsite, you can even use it over your campfire.
It’s a very handy item to have. If you live in an area that’s affected by snowstorms or even summer storms, having a percolator and knowing how to use it will be the one sense of normalcy you’ll have if you’re using it over your grill when the electricity is out.
Types of coffee percolation
Ready to test the waters with percolation? You can choose a stovetop percolator or an electric one. What’s the difference?
- With stovetop percolation, it’s the traditional way to go. You can also use a hot plate, which you can use anywhere you have access to electricity, or put it over a fire or grill. What’s important here is having a consistently hot temperature that isn’t up to boiling. You DON’T want it to boil. You DO want it to be hot, just below boiling for a good 5 minutes and that’s what’s going to give you a rich and strong flavor.
- Electric percolators on the other hand make it even easier. All you need is quality coffee beans and a proper ratio of coffee to water. These electric models have a heating plate and temperature sensor so you get it right every time.
Advantages of Using a Stovetop Percolator
Wondering why you should try a stovetop percolator? If you love coffee, like truly love it, you simply must taste it in this form. When it’s done right, it’s so spectacular, you’ll kick yourself for not doing it sooner.
It’s a very simple system to use. Most stovetop percolators only have about 3 pieces to them so it’s easy to figure out. They last a long time because they’re made from stainless steel. Some are made from aluminum which isn’t a good choice because it can react with coffee.
A stovetop percolator is wonderful for brewing small amounts too. If you live alone or perhaps with one other person, it can be a very intimate way to enjoy coffee together. It’s easy to clean up in the sink and there are no wasteful pods to dispose of. In short, the stovetop percolator is an environmentally-friendly choice for making coffee, one that rewards you with spectacular flavor.
Why use a Percolator to Make Coffee?
As mentioned above, there are many advantages to using a stovetop percolator. But even if you use an electric one, you will need to think about the coffee-to-water ratio, the size of your grind, the contact time, the depth of the coffee bed, the turbulence, and the water temperature.
Wait, what?
Don’t worry! It sounds much more complicated than it is and by the end of all this, it won’t sound so difficult, we promise!
First, you have to start with filtered water and freshly-ground high-quality coffee beans. You should always buy your beans whole and store them in an air-tight container (not in the freezer!) so they have the best flavor. Only grind up what you need for each pot of coffee you brew to ensure a perfect taste.
After that, you must make sure your coffee and water ratio fit for how much you need to make. Put the coffee grounds in the basket using the one-tablespoon-per-cup-of-water rule. Then heat your water to a near-boil.
Here’s where you keep watch… you want to lower the heat at the end of the process as it will keep it from boiling over. This way the water gets to the boiling point without going further. When it hits this point, you add the basket of coffee grounds. And that’s more or less how this seemingly-crazy contraption works.
Making the best percolated coffee
If you want to make the best percolated coffee, you’ve got to keep the following things in mind when you’re using your percolator.
– Brewing time
When coffee is too bitter, it’s usually because the brew is too vigorous and the length of time is too long. You don’t want to overexpose the coffee or else it will result in a cup of bitterness that will forever sour you to the process. When the boiling begins in the chamber, you have to watch out. It could make your already-brewed coffee come through the cycle once more which won’t taste good.
– Size of your coffee grounds
When you have a percolator for making coffee, you need a good coffee grinder. One that can give you a coarse grind is best. When the water is hot, these coarse particles contact with it to create the best taste. Plus, if your grounds are too fine, they can fall through the basket and into your final brew.
– Set your timer
When the water gets bubbling with some regularity, set your timer for no more than 10 minutes. This is why it’s important to experiment with this method when you’re not pressed for time or tired. Some recommend you only do it for 6 minutes while others say 8 minutes is ideal. It really depends on your own personal coffee tastes. The longer it percolates, the stronger it’s going to be, so if you prefer it less strong, start with a 6-minute brew and see how that suits you.
Regardless of how strong you like your coffee, 10 minutes is the maximum. Anything beyond that and you’ll destroy the taste. Just remember when you percolate your coffee, you can’t just set it and go about getting ready. It’s an active process which is again why we advise you try it out when you have some time. Once you run through it a few times, you’ll find it’s as fast or even faster than using a coffee machine.
One more crucial thing to keep in mind is that you should always remove that filter basket that contains the grounds first before you pour your coffee. This prevents you from getting extra grounds in your cup.
While it does take more patience, knowing how to percolate your own cup of coffee is something you’ll certainly come to appreciate. It tastes so much better and once you get your preferred ratio right, you’ll wonder why you didn’t start doing it sooner. Plus, if you love camping or have a large property with a lake, you might just be so inclined to percolate outdoors and truly appreciate the wonders of life with a gorgeous cup of coffee in-hand.
The Effects of Pre-Infusion and Percolation
Something else to consider when it comes to coffee brewing is pre-infusion. This can affect the final result of your brewing. Basically, it’s what gives it clarity and proper extraction.
Coffee needs to be saturated before that extraction process can begin and with the percolator, it’s very easy. Once your coffee has been saturated, it all extracts at the same rate which gives it a more even consistency. The only thing to watch out for is how the percolator traps moisture when the water is heating in the lower chamber and the heating itself.
It takes about 30 seconds to do this pre-infusion. After that, you should add the grounds to the percolator just before the water boils. Proper brewing allows for the flavors of the coffee to truly take hold. That aroma and the taste are unlike anything else when you follow this traditional coffee-making method, one that is sure to be your favorite!
Conclusion
Most people think of coffee percolators as something much more complex than they really are. The truth is they’re a rustic way to make coffee, one that you should try if you truly savor your cup of coffee daily.
It does take a more active approach and an observant eye, but once you percolate coffee on your stovetop, you’ll appreciate it even more. There are electric percolators that make it a little easier, though if you love the outdoors or live in an area prone to power outages from storms, learning to use a coffee percolator can always keep you in coffee no matter where you find yourself.

